Monday, August 31, 2009

Roasted Eggplant and Tomato Pasta with Marinated Mozzarella

This recipe came about based on what I had leftover in my refrigerator. It was a Saturday night and we had planned on going out to dinner; but we were both so tired we decided to stay in. So I hadn't planned for anything and basically just used what was around the kitchen. I had just seen one of Giada's shows where she made Pasta Ponza, which is where I got the roasting vegetables idea from, and I had some extra mozzarella I wanted to marinate so I used the technique in Shrimp and Brie Linguine.

Chuck and I really enjoyed this! He said the only change he would make to this is maybe to add some crumbled sausage so that there is a meat in it. I fully agree - I love using sausage in pasta and had been thinking that anyway, but didn't have any in the freezer. I hope you like this little concoction as much as we did!

Roasted Eggplant and Tomato Pasta with Marinated Mozzarella
from Colleen's kitchen
Makes 3-4 servings

olive oil
1 pint cherry or grape tomatoes, halved
1/2 medium eggplant, diced
2 tablespoons capers, drained
kosher salt and coarse black pepper, to taste
4 ounces (or more) fresh mozzarella, cubed
2 tablespoons good quality extra virgin olive oil
chopped fresh basil, to taste
red pepper flakes, to taste
8 ounces spaghetti or linguine

Preheat oven to 400 degrees F. Coat the bottom of a glass 13 x 9 baking dish with olive oil. Add the tomatoes, eggplant, and capers to the prepared dish, drizzle with more olive oil and toss to coat. Season with salt and pepper.

Bake for 30-35 minutes, or until eggplant and tomatoes are tender, tossing 1 or 2 times. Remove from oven.

Meanwhile, toss mozzarella in small bowl with good quality olive oil. Add basil, red pepper flakes, and salt and pepper to taste and let sit 30 minutes.

Meanwhile, bring a medium pot of salted water to a boil and cook to al dente according to package directions.

Drain pasta and toss together with roasted vegetables and marinated mozzarella, adding more good quality olive oil if necessary. Top with freshly grated Parmesan cheese if desired.


Friday, August 28, 2009

Cheese and Chicken Enchiladas

This is an old favorite that my mom has been making for years. Chuck loves them, and anyone my mom has made them for loves them. To me, it is a delicious, easy way to make enchiladas for a weeknight. And trust me, I am by no means under the impression that these are anywhere near "authentic" Mexican enchiladas, but man are they good!

For some reason, the number of enchiladas this makes varies every time for me. So have about 8 tortillas ready to fill but you probably won't them all. And for that reason, your baking dish may change in size as well depending on how many enchiladas you have. You want them to be pretty tightly packed in there, but not overlapping.

Cheese and Chicken Enchiladas
from Jo's kitchen
Makes 6-8 enchiladas
1 medium onion, chopped
2 tablespoons margarine or butter
2 cups shredded cooked chicken (about 2 breasts or 1 pound)
1 jar picante sauce, divided
8 ounces cubed cream cheese
1 teaspoon ground cumin
2 cups shredded cheddar, divided
8 flour tortillas

Preheat oven to 350 degrees. Coat an 11 x 7 or 13 x 9 glass dish with cooking spray.

Melt margarine or butter in a large skillet over medium heat. Add onion and cook until tender, 5-7 minutes. Stir in chicken and 1/2 cup picante sauce, cream cheese, and cumin. Cook until cheese is melted and everything is thoroughly heated. Stir in 1 cup shredded cheese.

Warm tortillas about 10 seconds in the microwave to make them easier to fold. Spoon 1/3 cup chicken mixture into the middle of each tortilla; fold in sides and roll up. Place seam side down in prepared baking dish. Continue with remaining tortillas and chicken mixture. Top with remaining picante sauce and shredded cheese.

Bake 15 minutes or until cheese is bubbly. (These can be prepared in advance all the way up to the baking stage.)

Not so pretty in the photo, but very delicious!

Wednesday, August 26, 2009

Lemon Blueberry Bundt Cake

I am not ashamed to say that I love seeing a recipe that includes a cake mix. It makes preparation so much easier, and if you are adding all sorts of things to it, what's the difference really? Another great thing about this recipe is that it uses no butter or oil, just applesauce! So with the blueberries and the applesauce in there, it's almost like you're eating health food, right?

As you can see, I did not make the glaze for this, as I was running short on time; and it was as delicious without as I am sure it is with the glaze. And just a storage note, this cake is VERY moist, so store any leftovers in the refrigerator to prevent spoiling (I learned this the hard way). I was also a little disappointed in how, although floured, all the blueberries dropped to the bottom of the pan while baking, but it still tasted great!

Lemon Blueberry Bundt Cake
from Deborah's Culinary Confections
Makes 1 bundt cake

Cake:
1 (18.25 ounce) package lemon cake mix
1 (3.4 ounce) package instant lemon pudding mix
1 cup water
1/2 cup applesauce
4 eggs
1 tablespoon fresh lemon juice
1 teaspoon lemon zest
2 cups blueberries
2 teaspoons sugar
1 teaspoon flour

Glaze:
1 cup powdered sugar
1 tablespoon fresh lemon juice
water, as necessary

Preheat oven to 350 degrees F. Grease a 10 inch Bundt pan.

In a large bowl of an electric mixer, stir together cake and pudding mixes. Make a well in the center of the mix and pour in water, applesauce, eggs, lemon juice, and lemon zest. Beat on low speed until blended. Scrape sides of bowl and beat on medium speed for 4 minutes.

In a small bowl, combine blueberries, sugar, and flour; toss to coat. Fold blueberries into cake batter with rubber spatula. Pour batter into prepared pan.

Bake for 50-55 minutes, or until a toothpick inserted in center of cake comes out clean. Carefully run a butter knife around the edge of the pan to loosen the cake. Allow to cool completely and then invert onto serving platter.

To make glaze, combine powdered sugar and lemon juice in a small bowl and whisk until smooth. Add water a teaspoon at a time until glaze reaches desired consistency. Drizzle over cake.

Monday, August 24, 2009

Eggplant, Tomato, and Mozzarella Salad

This is a delicious variation on your standard caprese salad, which is usually sliced tomatoes and mozzarella drizzled with olive oil and balsamic vinegar and topped with fresh basil. This recipe adds in an extra layer of flavor with the roasted eggplant - it is definitely a recipe I will be making again and again!

I basically just changed the ingredient amounts to feed Chuck and myself. It still made a lot
but we managed to finish it all in one sitting! I served this alongside grilled rib-eye steaks and parmesan and pea risotto.

Eggplant, Tomato, and Mozzarella Salad
amounts adapted from Everyday Food Magazine
Makes 2-3 servings

2 1/2 tablespoons extra-virgin olive oil
1/2 medium eggplant, cut crosswise into 1/4-inch-thick slices
Coarse salt and ground pepper
4 ounces fresh mozzarella, sliced
2 plum tomatoes, sliced
2 tablespoons loosely packed fresh basil leaves, torn
1 tablespoon balsamic vinegar

Preheat oven to 400 degrees F. Line a rimmed baking sheet with non-stick foil and brush with 1/2 tablespoon olive oil. Place the slices of eggplant on the baking sheet, brush the tops with 1 tablespoon oil and season with salt and pepper. Roast until eggplant is golden and tender, 20-25 minutes. Let cool to room temperature.

Layer the eggplant, sliced tomatoes, and mozzarella on a serving platter. Top with basil leaves and drizzle with 1 tablespoon oil and 1 tablespoon balsamic vinegar. Season to taste with salt and pepper.

Saturday, August 22, 2009

Chocolate Chip Cookie Dough Cheesecake Bars


If I had posted these bars before I chose my Top 10 Desserts, they definitely would have been included! I mean really, what's not to like? You have your cookie dough on top of a cheesecake layer on top of a graham cracker crust that is dotted with mini chocolate chips - heaven!

They took a little bit of time and effort because of the different components you have to make, but it's well worth it for the finished result! I normally don't line my pan with parchment paper (or foil, as I did here), even if the recipe tells me to, but I really recommend it with this one. Even when refrigerated, the bars are a little soft to cut, so taking out the whole pan of them really makes for nice, even bars.

I didn't make any other changes to this recipe except using low fat cream cheese (hey, gotta feel a little healthy, right?) so I will just link you to the blog, Dinner and Dessert, where I found these!

Pan lined with foil ready to bake...

and out of the oven.

Thursday, August 20, 2009

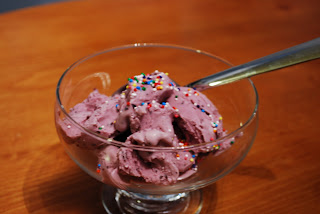
Blueberry-Sour Cream Ice Cream

My parents gave me the ice cream maker attachment for my Kitchen Aid mixer for my birthday and I was eager to get started using it! I had always been afraid to try making ice cream because I thought it was a long and involved process; but it definitely wasn't. It's as simple as mixing the ingredients, chilling them, then mixing in the ice cream maker and freezing.


This was a lovely summer ice cream - light and fruity. The sour cream makes it taste a little bit like yogurt, but we really enjoyed it!

Blueberry-Sour Cream Ice Cream
Makes about 1 pint

1 cup blueberries, fresh or frozen (if frozen, thaw and drain)
1/3 cup sugar, or more to taste
pinch of salt
grated zest and juice of 1/4 lemon, or more to taste
3/4 cup heavy cream
3/4 cup sour cream

Combine the blueberries, sugar, salt, lemon zest and juice in a medium saucepan over medium heat. Cook, stirring, until the mixture boils and berries pop and soften, about 3 minutes.

Place the berry mixture in a blender and puree until mostly combined, about 1 minute. Add the heavy cream and sour cream and pulse to blend. Taste and add more lemon juice or sugar if you'd like.

Pour the custard into a bowl, and refrigerate until chilled.

Pour custard into an ice cream maker and churn according to manufacturer's instructions. Pack ice cream into a container, cover, and freeze at least 2 hours, until firm enough to scoop.

Tuesday, August 18, 2009

Baked Chicken Fajitas

This is a great idea that I wish I would have thought of first. Instead of stir-frying the ingredients for the fajitas, you just bake it all together! Makes it easy to prepare in advance, and the house doesn't reek of peppers and onions for days afterwards!

You can play around with the seasoning in these - I didn't have fajita seasoning so I just increased the amounts of chili powder and cumin and added some garlic powder. And besides making a little less than the recipe calls for since it was just for the two of us I didn't make any other changes so I will just link you right to the original recipe from Molly Jean at The Rookie Chef:

Sunday, August 16, 2009

Blogiversary: Top 10 Desserts/Baked Goods

And here we have the last installment of my Blogiversary posts. I hope you have been enjoying them so far! I certainly have had fun doing them; and I am inspired for my next year in the kitchen.

Saturday, August 15, 2009

Blogiversary: Top 10 Entrees/Side Dishes

Happy weekend! It's time for Part 2 of the Blogiversary post. Today is Top 10 Entrees and Side Dishes (in case you couldn't tell by my title). Thank you for all of your comments yesterday and I hope you enjoy these as well!

If you get a chance, leave a comment and let me know YOUR favorite entree or side dish that I have posted over past year. There are definitely some I wanted to include and didn't have the space for! And here in no particular order:


And of course I have to give a special nod to my favorite guest blogger:

Friday, August 14, 2009

Happy Blogiversary to Me! Top 10 Appetizers/Snacks

It's finally here! One year ago today I began my blog, with some trepidation, a little anxiousness, and a lot of excitement! Since then I have posted over 250 entries, learned a teeny bit more about photographing food, and made a lot of great (and not-so-great) dishes. I know Chuck has appreciated it (he gets new food to try all the time) and my family and friends enjoy having my recipes all in one convenient place.

To commemorate my blogiversary, I have decided to do a weekend extravaganza of Top 10's from the past year. I based these mainly on the dishes I make again and again and which ones received the best reviews from the people who were eating them! Today we have top appetizers and snacks (which is why the pizza is included here), tomorrow will bring top entrees and side dishes, and we will end on Sunday with top desserts and baked goods!

Which were your favorite appetizers or snacks of the past year from Cooking This and That?

Click on the title to link to the recipe!