Sunday, December 18, 2011

Christmas Eve Brunch 2011

Some pics of last year's festivities at our house:


Abbie refused to be anywhere except right in between Chuck and I so Chuck had to awkwardly turn his back to whoever he was standing next to :)


This year's brunch will include mostly old favorites, plus a few new things here and there. It's always a nice time to sit and relax before the craziness of the next few days begins!


Christmas Eve Brunch 2011


Happy Holidays to you and yours!

Wednesday, December 14, 2011

Salsa Verde Enchiladas

This enchilada recipe is an old favorite of mine. It's the only one I've tried with salsa verde and I really enjoy it as an alternative to red sauce enchiladas. Fairly simple to make and assemble, it requires shredded chicken mixed with the salsa verde and a simple sauce made on the stovetop. Assemble, bake, and voila, you have a delicious meal. I like to serve this with Sauteed Corn and Black Bean Salad.


Salsa Verde Enchiladas

from source unknown

Makes 8 enchiladas


1 rotisserie chicken, shredded or 1 pound shredded chicken (about 2 1/4 cups)

1 jar (16-17 oucnes) mild salsa verde

3 green onions, thinly sliced

2 tablespoons lime juice

2 tablespoons fresh or 2 teaspoons dried cilantro

8 medium-sized flour tortillas

1 cup sour cream

1/4 cup chicken broth

1 cup shredded Mexican cheese blend


Preheat oven to 350 degrees F. Coat a 13x9 baking dish with cooking spray.


In a medium bowl, stir 1/4 cup salsa verde into shredded chicken. Set aside.


In a large skillet, heat remaining salsa, onions, and lime juice over medium-high heat. Bring to a boil for 2 minutes, stirring occasionally. Stir in 1 tablespoon cilantro, keep warm on very low.


Place one tortilla in salsa mix, turning to coat (tongs help here), heat 10 seconds. Place coated tortilla on work surface, top with 1/3 cup chicken mixture. Roll and place seam side down in prepared dish. Repeat with all 8 tortillas.


Stir sour cream and broth into remaining salsa in skillet. Spoon over filled tortillas in dish.


Cover with foil, bake 15 minutes. Remove foil, sprinkle with cheese and remaining cilantro and bake uncovered, 5 minutes, or until cheese melts.

Saturday, December 10, 2011

White Bean and Chicken Soup with Pesto

While browsing through my mother's Sandra Lee magazine (I know, clutch your pearls in horror) I saw several recipes that I thought would be good for weeknight dinners. This easy, comforting soup was one of them. And it actually doesn't really use any pre-packaged processed food, unless you count the ready-made pesto. The white beans go nicely with the shredded chicken in a tasty broth. The pesto on top ends up just getting mixed into the soup of course, so if you don't like the taste of pesto, just skip it as a garnish.


I let the soup simmer a little longer than the recipe suggests both before and after the chicken is added. And if you are making shredded chicken instead of using a rotisserie one from the store, make sure you season it nicely with salt and pepper. I did not and I think it would have added even more flavor to this. Serve with a few slices of Texas Toast and a green salad!


White Bean and Chicken Soup with Pesto

from Sandra Lee Semi-Homemade magazine, Christmas 2011 issue

makes 5-6 servings


2 tablespoons olive oil

1 medium onion, chopped

1 cup carrot, chopped

2/3 cup celery, chopped

3 cups low-sodium chicken stock

2 1/2 cups water

2 cans cannellini beans, drained and rinsed

1 tablespoon tomato paste

1 teaspoon garlic powder

12 ounces roasted pulled chicken (I used a pound of shredded chicken)

1 tablespoon balsamic vinegar

6 tablespoons prepared pesto


In a large saucepan, heat olive oil over medium heat. Add onion, carrot, and celery and cook 5 minutes or until tender.


Add stock, water, beans, tomato paste, and garlic powder. Stir to mix and bring to a boil over medium-high heat. Reduce to medium-low heat and simmer, partially covered, for at least 20 minutes.


Add chicken and vinegar, simmer 5 more minutes or until heated through.


Serve immediately and top each bowlful with a tablespoon of pesto.

Friday, November 25, 2011

I'm baaaack...

...well, kind of. In an effort to catch up with everything I've been cooking and not photographing and not posting, I'm going to dedicate the next several posts simple to posting links to the recipes. Otherwise, they would never get added to the blog, and the ones I really liked would be lost in internet oblivion. And I know it's bad food posting etiquette to do this, but honestly, the point of my blog is to share what I make with family and friends, as well as to make myself a recipe database; so that's what's happening.

So bear with me as I post links to recipes and no pictures. I'm trying to get back on the blogging bandwagon!

Tuesday, October 25, 2011

Fall Friday Night Dinner with Friends

(Gratuitous picture of Abbie just because it's cute)


It's been SO long since I've posted a menu! We haven't been doing a whole lot of entertaining at our house lately, just due to so many plans at so many other places. Plus, we've been trying to sell our house so we don't plan too far in advance and try to keep it neat around here!


But the housing market has slowed (um, from very slow during the summer to practically at a standstill right now) and it had been WAY too long since we got together with a particular group of our close friends; so we planned a night in. I'm getting help from my friends in the way of appetizers and dessert, but here is what I am planning on serving for dinner:


Fall Friday Night Dinner with Friends


with some Pumpkin Blondies to round out dessert!

Tuesday, October 18, 2011

Spinach and Turkey Stuffed Shells

Another fabulous weeknight pasta meal! These take a little bit longer than some other pasta bakes, only because you have to take the time to stuff each shell; but it's worth it. A creamy mix of ground turkey and healthy spinach make a delicious filling for these shells. I adjusted the amounts from the original recipe beacuse I wanted to make some for dinner and then freeze some. I also used ground turkey instead of sausage because I wanted to make these a little healthier (well, except for all the cheese!).


Otherwise, Molly's recipe was perfect and I will definitely be making them again soon!


Spinach and Turkey Stuffed Shells

slightly adapted from The Rookie Chef

makes 6-8 servings


10-ounce package frozen chopped spinach, thawed and drained

olive oil

1 or 1.25 pounds ground turkey

8-ounce package cream cheese, softened

about 25 jumbo pasta shells

1 medium onion, chopped

2 cups marinara sauce

shredded mozzarella cheese


Preheat oven to 350 degrees F. Spray a 13 x 9 dish with cooking spray, set aside.


In large skillet, brown ground turkey, drain fat and set aside. In same skillet, heat a little bot of olive oil and add onion. Saute until softened and translucent, about 4-5 minutes. Add spinach and cream cheese and cook until combined. Add ground turkey back in and stir to heat thoroughly. Remove from heat.


Meanwhile, cook pasta shells according to package directions. Drain and separate on a cutting board so they don't stick together. (A fabulous tip from The Rookie Chef.)


(The following directions are for preparing half of this mixture. I froze the other half - of just the stuffed shells - but if you wish to bake them all at once, just prep two dishes to bake.)


Spread some marinara sauce over the bottom of prepared baking dish. Stuff each shell with a tablespoon or two of the meat mixture. Place the shells in the baking dish and cover with another layer of sauce.


Cover with foil and bake for 30 minutes. Then uncover dish, sprinkle with mozzarella cheese and bake 10 more minutes, or until cheese is melted.


Friday, October 14, 2011

Buffalo Chicken Enchiladas

These were deeee-licious. We are big fans of buffalo chicken and as soon as we sat down and started to eat these Chuck said, "I didn't know this was exactly what I wanted to eat until I started eating it". Suffice it to say that we both loved them and I will be making them again soon! (Especially since we already ate the ones in the freezer as well!)


I didn't change anything that Jessica of How Sweet It Is wrote in the original recipe so I'll link you below. If you want to freeze half, just pile the enchiladas into a container, freeze half the sauce, and do the final baking when you defrost them. Enjoy!


Buffalo Chicken Enchiladas

Friday, September 16, 2011

Corn and Zucchini Orzo Salad

I wanted to post one last pasta salad before the cold weather overtook us for good. This recipe was in an article of Everyday Food that discussed making big batches of food and using it for several different dishes. This was a good weeknight pasta salad, and I liked the technique of salting the zucchini to drain the excess water out of it.

Since this recipe was for a big batch (calling for one pound of orzo, which, since orzo seems to multiply in magical fashion, is a LOT) and I only wanted to use it for a side dish and then some lunches, I only made a third of the original recipe, which was still a lot. Other notes I have about the recipe:


  • Red onion seems to lose it's color when mixed into a dressing after awhile. If you need to make this over 12 hours in advance, I wouldn't add the red onion until right before serving.

  • For the small amount of jalapeno that was added, it contributed a big flavor to the salad. Not a spicy one, but one that I didn't really enjoy, so next time I will leave this out.

Here's the link...and good-bye summer!!


Corn and Zucchini Orzo Salad

Monday, September 12, 2011

Grilled Chicken and Roasted Tomato Salad


This salad-as-a-meal was a big winner in our house - Chuck even said he liked it better than any other salad entrees I've made! It was a nice, simple recipe, and the roasted tomatoes really added a delicate sweetness to the salad. Don't be afraid of the cannellini beans either (MOM!), they taste delicious mixed with the dressing.


The amounts in the link to the recipe will definitely serve 4 people - but if you keep all the ingredients separate (esspecially the dressing), you can definitely make a lunch out of the leftovers the next day. And as you can see above I added some large chunks of fresh mozzarella to the mix. Enjoy!


Thursday, September 8, 2011

Baked Eggplant Parmesan

This was so, so, so good. A nicely breaded eggplant baked with sauce and cheese, and the best part about it is that EVERYthing is baked in the oven. No breading the eggplant and pan-frying it on the stove so that you are splattered with oil. It's a little time-consuming just based on the bake time, but it's totally worth it.


I halved the whole recipe to make dinner for Chuck and I and there were tons of leftovers. We each ate ONE of those stacks below as our whole dinner, plus a green salad. The only change I made from the original recipe from Bite This! besides the amounts was not to add the last layer of cheese after uncovering the dish. Since I was only making it for a weeknight dinner, I didn't feel that we needed MORE cheese; but if I was making this for a dinner party I think it would be delicious. I will definitely be making this again in the future, and can't wait to serve it to company!


Sunday, August 28, 2011

Lemon and Crab Linguini with Feta

As I type this the sun is peeking out from behind the clouds and we have survived the hurricane/tropical storm here on the East coast. Hopefully everyone else has as well and doesn't have too much drying out to do!

This recipe caught my eye because I had some extra feta in the fridge. This uses imiation crab meat, which I enjoy, but if you really have a problem with it, the pasta would be delicious with some fresh crab as well. I really recommend using fresh herbs to garnish at the end because the dried ones I used didn't really do the trick. Fresh lemon is also a must; and the end result is a light, delicious pasta!


Here's the recipe from Simply Satisfying:


Tuesday, August 23, 2011

Cookies and Cream Double Chocolate Cake Bars

I chose this recipe to make to bring to a barbecue because A. it looked super easy and B. it looked super delicious. And I was right on both counts! I mean, how can you go wrong with Oreos, chocolate cake, and chocolate chips?


The only note I have on this recipe from Picky Palate is that once I reached the prescribed baking time, my bars were still rather jiggly in the oven. ;) I needed about 15-20 minutes more, to make sure the middle was set, but then the bars were on the dry side. I am notorious for underbaking so I was nervous about them but next time I won't overbake quite as long. So basically what I am telling you is just to watch the oven!


Friday, August 19, 2011

Penne with Grilled Summer Squash, Sweeet Corn, and Shrimp

I think it's pretty obvious that we love pasta in our house. This recipe from a recent issue of Everyday with Rachael Ray used delicious summer vegetables and one of my favorites - ricotta cheese. I made it into a main meal by adding some shrimp to the mix. Chuck and I both agreed that this dish needed more flavor. The original recipe did not call for cooking the tomatoes, but my version below suggests sauteeing them a little with the garlic to add a little more depth.

Penne with Grilled Summer Squah, Sweet Corn, and Shrimp
adapted from Everyday with Rachael Ray
makes about 3 servings

1/2 pound penne pasta
1/2 pound large shrimp, peeled and deveined
2 yellow summer squash (just under a pound), halved crosswise and then cut into 3 thick slabs
3 tablespoons olive oil
salt and pepper
1 tomato, chopped
3/4 cup corn kernels (1 ear or use frozen)
1/2 of a 15-ounce contained ricotta cheese
1 clove garlic, grated
1 teaspoon chopped thyme

Preheat a grill to medium-high or a grill pan on the stove over medium-high heat.

Cook pasta in a large pot of salted, boiling water according to package directions. During last 3 minutes of cooking, add shrimp. Drain pasta and shrimp, reserving 1/2 cup of the cooking water.

Brush the squash pieces with 2 tablespoons olive oil and season with salt. Grill, turning once, until charred, about 10 minutes. Cool slightly, then coarsely chop and put in large bowl.

In small skillet, heat 1 tablespoon olive oil over medium heat. Add garlic, cook until fragrant, then add chopped tomatoes and cook until slightly softened, 3-4 minutes. Add to squash, along with ricotta cheese and thyme. Add the pasta and stir in some cooking water if needed.

Season to taste with salt and pepper. Serve immediately with Parmesan cheese, if desired.

Monday, August 15, 2011

Emeril's Turkey and Pinto Bean Chili

We've had a rainy few days here in the Northeast and yesterday I was inspired to make some chili. I had just found this recipe in the newest issue of Everyday Food and went to the supermarket in the pouring rain for all of the ingredients. :)


My favorite chili is still 6-Hour Chili but this is a good one to make if you don't have a lot of time. And the addition of the pinto beans adds more protein with not too much fat. I will say that the simmering time on this is very underestimated. I simmered the chili for about 45 minutes (the recipe suggests 20 minutes) and I still had to serve the chili with a slotted spoon to drain all of the excess liquid. But it was a delicious rainy Sunday night meal after a busy weekend!

Emeril's Turkey and Pinto Bean Chili
from Everyday Food
makes 6-8 servings

4 slices thick-cut bacon, diced small
2 medium onions (or 1 large), diced small
1 large red bell pepper, stemmed, seeded, and diced small
1.25-1.5 pounds ground turkey
3 tablespoons chili powder
2 teaspoons cumin
1 tablespoon chopped garlic
2 teaspoons dried oregano
coarse salt and ground pepper
1 can (14.5 ounces) diced tomatoes, undrained
2 cans (15.5 ounces each) pinto beans, drained and rinsed
2 tablespoons finely chopped fresh cilantro
shredded cheddar cheese and sour cream (optional)

In a large Dutch oven or other heavy pot, cook bacon over medium-high heat, stirring occasionally, until bacon is crisp, about 8 minutes. Add onions and bell pepper and cook until vegetable soften, stirring occasionally, about 3 minutes. Add ground turkey, chili powder, cumin, garlic, oregano, and cook about 6-8 minutes, until lightly browned and cooked through. Continually break meat up with wooden spoon. Season with salt and pepper.

Add tomatoes with juice, beans, and 2 cups water. Bring to a boil then reduce to a rapid simmer. Partially cover, and cook, stirring occasionally, until sauce thickens. (This could take anywhere from 20-45 minutes, or more.)

Serve topped with cilantro and shredded cheese and/or sour cream, if desired.

Thursday, July 21, 2011

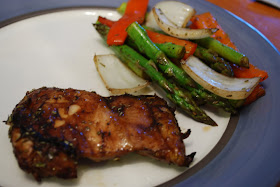
Grilled Balsamic Chicken and Vegetables

This was a great weeknight meal, especially because I could prep it and Chuck could grill it! The blog I took it from, C+C Marriage Factory, said they liked it as a healthy meal; but of course I had to add some au gratin potatoes on the side. :)


The marinade was delicious, but I would marinate both vegetables and chicken much longer than the suggested half hour to absorb more of the flavor. And maybe save some of the marinade before adding it to the chicken so that you can baste while grilling. The only other change I made to the original recipe was to eliminate the mushrooms because Chuck doesn't care for them. I also think this would be good for a crowd because it's so easy to prep and cook!


Sunday, July 17, 2011

Roasted Potatoes with Ricotta

These were part of our Fourth of July meal alongside the ribs and I liked the idea that I could make little individual portions for each of us. Usually I dollop sour cream all over my baked potato, and the substitution here of ricotta was delicious. Chuck doesn't normally like ricotta and even he said they weren't as offensive as he thought they would be!

I couldn't find new potatoes in the supermarket (and they're usually way more expensive than regular potatoes as well) so I bought a bag of baby red potatoes. If you do this, just adjust your cooking time based on the size of potatoes. Mine took about 50 minutes in the oven. Link below!

Roasted Potatoes with Ricotta

Wednesday, July 13, 2011

EJ's Simple Ribs

Why, hello there! Have you missed me? Between vacations, the heat, and the general weariness of chasing around an active toddler all day; I haven't been cooking or baking much of anything new in the kitchen. But I'm back with a few new things!


With all the family parties and birthdays we have going on, somehow Chuck and I were able to spend the actual fourth of July by ourselves. So I wanted to make it a special meal that I wouldn't normally make for the two of us. I decided on pretty traditional ribs but went the extra mile and found a recipe to make my own rub and sauce.


These were pretty good! Chuck wants to try cooking them lower and slower in the oven next time - maybe 2-3 hours at 250 degrees instead of the recommended time and temperature in the recipe. I would also suggest leaving a LOT of time to reduce the sauce down to your desired consistency. The recipe suggests simmering for 30 minutes - I simmered for well over an hour and it still wasn't as thick as I would have liked it.


But all in all, these were good and I was pretty proud of myself for taking the time to make everything myself. I served these alongside roasted baby potatoes with ricotta and a tomato/mozzarella/pesto salad. Link to the ribs below with the rib sauce link within that:


Saturday, May 21, 2011

Crockpot Santa Fe Chicken


Head on over to C+C Marriage Factory and check out the picture for this recipe - it's what made me save the recipe in the first place. Christina's picture is so light and clean, it didn't remind me of your typical heavy crockpot meal. I have made variations on this recipe, but I liked that there was no salsa added to the chicken, just vegetables and spices. I served this over rice for myself and Chuck had it on tortillas. Delicious!


Crockpot Santa Fe Chicken

Tuesday, May 17, 2011

Salmon with Brown Sugar and Mustard Glaze

I love finding new, easy ways of making fish. Basically anything that calls for broiling the fish and then adding a topping is simple and usually delicious. This one did not disappoint - the mustard and brown sugar played nicely off of each other and paired well with the salmon.


I adjusted the amounts to feed just Chuck and myself, since fish doesn't save well, so that is reflected below. The original recipe also calls for lemon wedges and watercress to serve alongside but I didn't need to get that fancy on a weeknight. :)


Salmon with Brown Sugar and Mustard Glaze


amounts adapted from Everyday Food


Makes 2 servings


1/2 tablespoon extra-virgin olive oil


1 small shallot, minced


2 tablespoons red wine vinegar


2 tablespoons whole-grain mustard


2 tablespoons packed brown sugar


kosher salt and coarse ground black pepper


2 (roughly 8-ounce) salmon filets, skin removed


Heat broiler to high, with rack in top position. Line a rimmed baking sheet with non-stick foil.


In a small saucepan or skillet, heat olive oil over medium-high. Add shallot and cook, stirring often, until softened, about 3 minutes. Add vinegar and cook until slightly evaporated, 1 minute. Add mustard and brown sugar; stir until warm and combined. Season with salt and pepper and remove from heat.


Place filets on prepared baking sheet and season with salt and pepper. Transfer 1/4 cup glaze to a small dish and brush on top of salmon. Broil salmon until glaze is bubbling and fish is opaque throughout, 5 to 10 minutes, depending on thickness. Brush remaining glaze over filets and serve immediately.


Friday, May 13, 2011

Raspberry Cheesecake Swirl Brownies

You really can't go wrong with a dessert that has cheesecake, chocolate, and raspberry in it. And these little bars definitely did not disappoint. A delicious layer of dark chocolate brownie is topped with a layer of creamy cheesecake swirled with raspberry jam.

The recipe calls for chopped dark chocolate, but you can just as easily use dark chocolate chips. Other than that, the directions were perfect, so the link is below!


Tuesday, May 10, 2011

Mother's Day Dinner 2011

This year for Mother's Day, Chuck and I had our families over for dinner to celebrate. I enjoyed spending my second Mother's Day with Abbie as well as with my fantastic mother and fabulous mother-in-law. I wanted dinner to be easy to put together beforehand and asked all the siblings to help with appetizers and dessert. Everyone brought something delicious and we all had a good time eating, drinking, and blowing bubbles with Abbie. :)

Mother's Day Dinner 2011

Appetizers


Dinner


Dessert


Sunday, May 1, 2011

Chocolate Zucchini Snack Cake

I was hosting a little ladies' lunch with some friends and saw this in a recent issue of Everyday with Rachael Ray. There is a zucchini bread I make that I really like, so I figured if you add chocolate it just gets even better!

This was a very tasty little snack cake, but personally I would stick with serving it at lunch and not after a fancy dinner party. It was a pretty dense cake, with a nice chocolate taste, and the only way you could tell there was zucchini in it was the texture. A little on the dry side, I would definitely recommend serving it with the vanilla yogurt as pictured and suggested in the recipe. If you don't have espresso powder, ground coffee will do just fine; and I used the more neutral-tasting canola oil instead of olive oil. Enjoy!

Chocolate Zucchini Snack Cake

Thursday, April 28, 2011

Dulce de Leche and Chocolate Chunk Bread Pudding

I was never a huge fan of bread pudding because I always thought it came out too dry and not sweet enough. Well, this one changed my mind! Soaked in a creamy caramel sauce and dotted with chocolate, the bread was moist and delicious.

Make sure you buy a nice egg bread, or challah, for this. The only change I made from the original recipe was to use dark chocolate chips instead of bittersweet, and I would suggest using a whole cup instead of just a half.

If you can't find dulce de leche sauce, mixing equal parts butterscotch and caramel sauce works just fine, and you can really taste the rum so use one of good quality.

Serve with vanilla ice cream and enjoy!

Dulce de Leche and Chocolate Chunk Bread Pudding

Monday, April 25, 2011

Oven-Fried Shrimp with Aioli

I think I've talked before about how great the recipe section on Williams-Sonoma's website is. It is full of great, classic recipes that always deliver. When I am in need of a dish to either inspire me or to complement a menu I am already working on, I turn there first.

This recipe from there was simple and easy to put together. I almost always use frozen shrimp I buy at the grocery store for any weeknight dish; but since this recipe was so straight forward and I was going to be serving it to friends, I ordered some nice pink Brazilian shrimp from the butcher.

I was able to prepare this slightly in advance, coating the shrimp with panko and then storing them in the fridge until I was ready to bake them right before serving. The aioli is delicious - just don't go overboard on the mayonaise so that you can taste the garlic and lemon in it. Link below!

Oven-Fried Shrimp with Aioli

Friday, April 22, 2011

Warm Spinach Salad with Strawberries, Bacon, and Goat Cheese

This salad earned rave reviews during dinner and also garnered a lot of attention when I posted on Facebook that I was making it. I'm pretty sure the secret is that the dressing is made almost entirely of bacon grease. Healthy? No. Delicious? Yes.


The original recipe called for adding orzo and pecans to the salad but since I was already serving orzo and don't really like nuts I just adjusted a few things so that it fit my menu better. You can make the dressing in advance and just reheat over low heat on the stove to get the bacon grease all nice and warm again. I hope you enjoy this decadent salad as much as we did!

Warm Spinach Salad with Strawberries, Bacon, and Goat Cheese
adapted from How Sweet It Is
makes 4 servings

6 slices bacon, uncooked
1/2 red onion, sliced
2 garlic cloves, minced
8 ounces baby spinach
8-10 large strawberries, sliced
1/2 cup (2 ounces) goat cheese, crumbled
Kosher salt and coarse ground black pepper

Heat a large skillet over medium-high heat and add bacon slices. Cook until brown and crispy, turning once. Remove from skillet and drain on a paper towel. Cool slightly and coarsely chop.

Leave skillet on and add red onion, sprinkle with a little salt, and stir to coat with grease. Cook until soft and caramelized, 8-10 minutes. Add in garlic and cook for 30 seconds until fragrant. Add strawberries and mix to coat. Remove from heat. Season with salt and pepper and add bacon crumbles. This can be prepared a few hours in advance, just reheat whole mixture gently when ready to serve.

Place spinach in large serving bowl, top with bacon mixture, then goat cheese. Season to taste with salt and pepper. Toss to combine all and serve immediately.

Tuesday, April 19, 2011

Spring Dinner with Friends

This past weekend we had our good friends Krista and Evan and their daughter Ella up for dinner and games (once the girls went to bed!). Of course I wanted a menu I didn't have a lot of prep work for and I wanted to try and usher in the warm weather with some summery dishes. This of course involved grilling and a pasta salad but I also wanted it to be special enough to serve to such close friends. I think I did a pretty good job! The link for the chicken below is right to Williams-Sonoma's website because the chicken is so ridiculously easy I don't even need to blog it.

Krista so nicely brought 2/3 of the appetizers (as well as some delicious Malbec to go with dinner) so I have no recipes there but everything else will have a link over the next week or so! Enjoy!

Spring Dinner with Friends
Appetizers


Dinner


Dessert


  • Dulce de leche and chocolate chunk bread pudding served with vanilla ice cream and chocolate syrup

Thursday, April 14, 2011

Baked Pasta with Turkey Meat Sauce

My father-in-law so nicely comes once a week to watch Abbie so that I can go to a late afternoon class at the gym. Since the class is so late in the day, by the time I get home, it's a rush to get dinner on the table. Baked pastas are perfect for these evenings because I can prep all the way up to the baking stage while Abbie naps earlier in the day, then I just pop it in the oven when I get home from the gym.

This recipe caught my eye because I had a lot of these ingredients already on hand. The original recipe calls for only 3/4 pound of ground turkey and I thought I would stretch the meal a little by using the regular package of 1.25 pounds turkey. Well, the outcome was a little dry, since I used the same amount of sauce and cheese to cover more meat. So I am going to recommend you follow all the amounts of the original recipe for a nice, quick weeknight dinner. :)


Monday, April 11, 2011

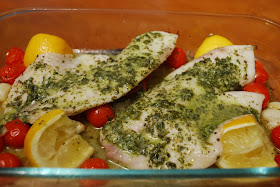
Tilapia with Lemon Pesto and Oven-Roasted Tomatoes

I've been making this recipe for a few years and for some reason have never blogged it. I swear I did but then in looking through my blog recently for it, couldn't locate it (although I have been known to post things twice!). And since I started making it pre-blog I had no idea where it came from. Thankfully, Proceed with Caution just posted it and linked me back to Elly Says Opa, who came up with this great dish.


The lemon in the pesto adds a brightness to the fish, and the smashed garlic cloves give a delicious flavor to the roasted tomatoes. I like to serve this with rice pilaf and roasted asparagus. Happy Spring!


Thursday, April 7, 2011

Casual Cousins Dinner

Last weekend we had my cousin Katie, her husband Jeff, and her daughter Carlyn along with my sister Meghan over for a casual dinner. I wanted to plan something Carlyn would enjoy that was also on the "casually elegant" side for the adults. I think it worked! Chuck grilled the steak of course, which I ordered from the butcher, so they were delicious. And I was able to prep virtually everything else in advance. I didn't really change anything from the original recipes I used, so I will link you right to them below instead of writing separate posts for them. And please enjoy the best shots we could get of a 3-year-old and a very squirmy 1-year-old! Casual Cousins Dinner Appetizers

Dinner


Dessert


Monday, April 4, 2011

Chicken Hot Pockets


This is a nice, hearty appetizer good for a cocktail party or any other event where you aren't serving a full meal right away. Basically a crescent roll wrapped around a mixture of chicken, cream cheese, and green onions; it's great finger food and very delicious.

I thought it would be a little troublesome to fold the cresecent rolls around the mixture but it was really very simple and just took a little bit of prep time. I was bringing these to a party so I made the chicken mixture in advance, refrigerated it and then assembled the pockets and baked them right before the leaving for the party. These can be reheated in a 350 degree oven for about 5 minutes, covered with foil.

Assembled and ready to go in the oven

I had printed this recipe out before I started blogging so there is no citation, but I changed a few things around anyway. If this looks like it might be your recipe, please send me the link to it and I will give you credit!

Chicken Hot Pockets
adapted from unknown source
Makes 24 pockets

1 package (8 ounces) cream cheese, room temperature
8 tablespoons (1 stick) butter, melted
2 cups chicken (about 1 pound or two chicken breasts), cooked and shredded
3/4 teaspoon salt
1/4 teaspoon pepper
3 green onions, chopped
3 (8-ounce) packages crescent rolls
cooking spray

Preheat oven to 350 degrees F. Line two baking sheets with non-stick foil or parchment paper.

In large bowl, combine cream cheese and melted butter with an electric hand mixer. Add chicken, salt, pepper, and green onions, and mix to combine.

Unroll dough (it's easier if you do this one package at a time). Cut each package into 8 squares. Firmly press perforations in rolls to seal. Spoon a heaping tablespoon of chicken mixture into the middle of each square. Pull the 4 corners of the square up to the center; twist and pinch edges to seal.

Place on prepared baking sheet. Lightly spray the top of each pocket with cooking spray.

Bake 20-25 minutes or until golden brown.

Friday, April 1, 2011

Oreo Cream Cheese Swirl Brownies

This is a great, classic dessert bar with a made-from-scratch brownie foundation and a delicious sweet cream cheese topping. And don't forget the Oreos! They kind of reminded me of the Princess Brownies I have blogged before, but more delicious (and more time-consuming). This is a perfect dessert to bring to a party or to keep in the house and devour yourself.

A few notes: 1 1/2 cups of Oreo cookies is about 18 cookies (although if you have leftovers, they make a perfect topping for ice cream). I also baked this for way longer than Annie directs, about 38 minutes in my oven; and although Annie suggests storing these in the fridge, I think it dries the bars out, so try them at room temperature. Otherwise, these are perfect - enjoy!

Oreo Cream Cheese Swirl Brownies